
How to Install and Use a Waistband Drill Caddy for DIY Home Projects
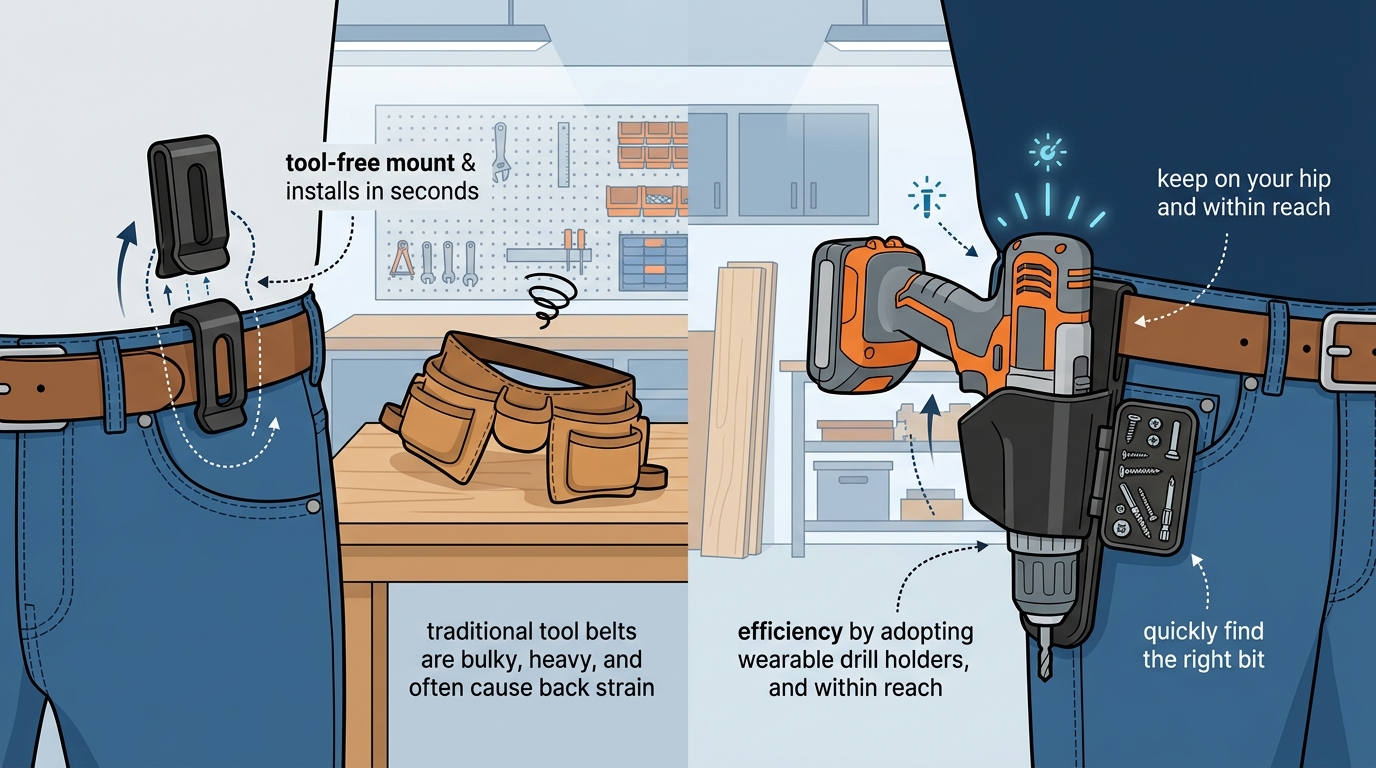
Traditional tool belts are bulky, heavy, and often cause back strain during long renovation days. According to recent industry data on ergonomic tool storage, professional tradespeople who switch to wearable caddies report a 30% reduction in time spent searching for equipment. This shift in productivity is not just for professionals. Homeowners tackling weekend DIY projects can achieve the same efficiency by adopting wearable drill holders. This guide explains exactly how to install and use a waistband drill caddy to keep your cordless drill and bits within immediate reach. (Contact My Tool Mania)
Understanding the Wearable Drill Caddy System
A wearable drill caddy is a specialized holster designed to attach directly to your waistband or belt loops. Unlike traditional holsters that require a heavy leather or nylon belt, these caddies use a universal clip or strap mechanism. This design allows for rapid deployment and removal without the discomfort of a tight, gear-laden belt. (The Complete Bundle Tool)
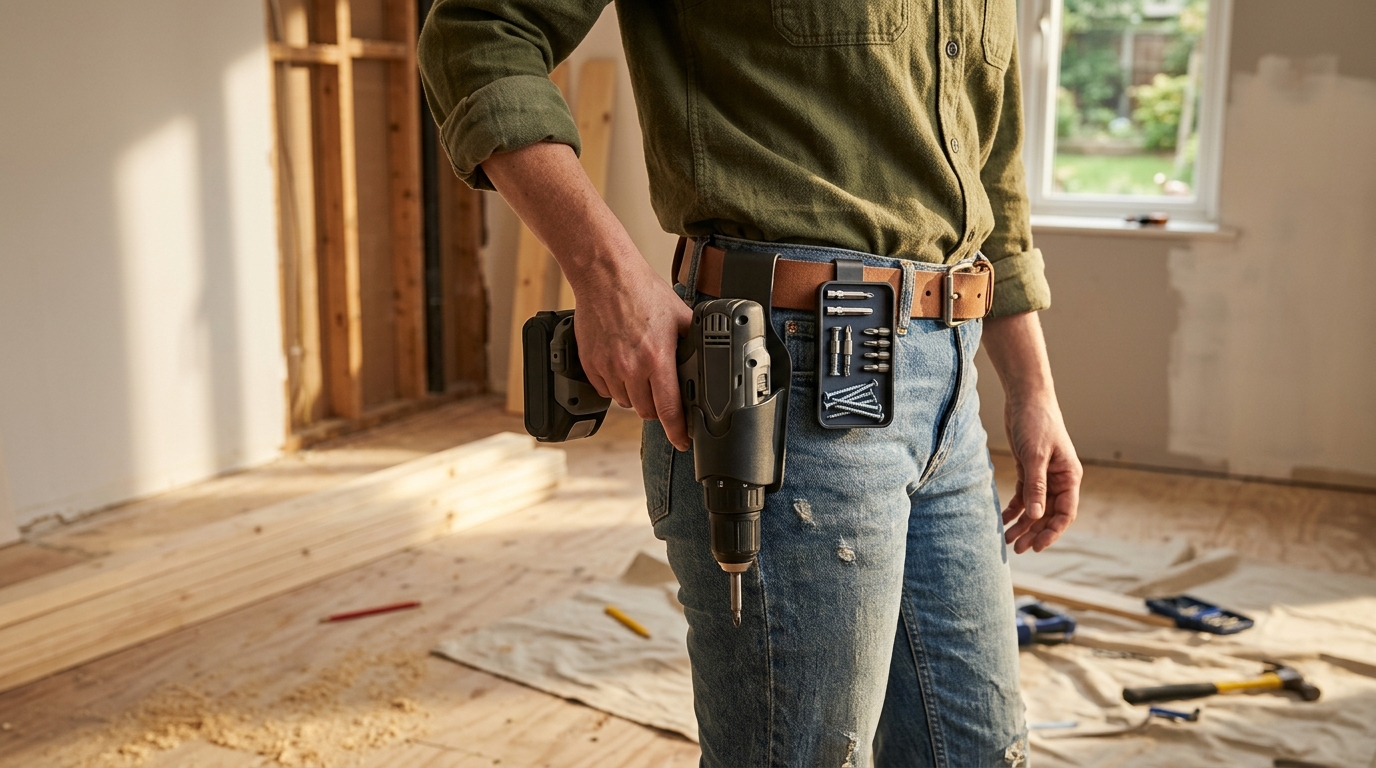
The Drill Caddy is a wearable drill holder that carries virtually every cordless drill brand, with no tool belt required. It slides on faster than a traditional holster and rides comfortably wherever you want it. By keeping your primary power tool at your hip, you eliminate the need to bend down repeatedly to retrieve your drill from a toolbox or the floor.
For those who frequently switch between drilling and driving, the system is designed to work in tandem with a bit holder. The Bit Caddy provides instant access to your bits and fasteners, held tight by a powerful N35 magnet. This combination creates a complete, head-to-toe tool accessibility system that keeps your workflow uninterrupted.
Choosing the Right Fit for Your Drill
Before installation, it is critical to ensure your drill fits the caddy securely. Most modern cordless drills, including popular brands like DeWalt, Milwaukee, and Makita, are compatible with universal caddy designs. However, drill sizes vary significantly based on their voltage and intended use.
When selecting your setup, consider the size of your drill. The Drill Caddy is engineered to hold virtually any cordless drill, but larger hammer drills may require a specific mounting orientation. If you are using a smaller compact drill, the standard clip provides a snug fit. For larger tools, you may need to adjust the tension of the retention mechanism to prevent the drill from slipping during vigorous use.
Additionally, consider the Bit Caddy size. Available in Regular and Large options, the Bit Caddy size should match your bit collection. If you use a wide variety of bit types, the Large option offers more storage capacity. The Bit Caddy is best for everyday bits and fasteners, held tight by an N35 magnet. This magnetic retention ensures that your bits do not fall out when you are moving around the job site.
Step-by-Step Installation Guide
Installing a waistband drill caddy is a straightforward process that takes less than a minute. The design prioritizes speed and ease of use, allowing you to get back to work immediately. Follow these steps to ensure a secure and comfortable installation.
Step 1: Position the Caddy
Decide which side of your body you prefer to wear the drill on. Most users prefer their dominant hand side for easy access. Clip the Drill Caddy onto your belt loop or waistband. The caddy is designed to slide on faster than a traditional holster, so you can position it anywhere along your hip that feels natural.
You can wear it on your left hip, right hip, front, or back of the waist. This flexibility allows you to customize the fit based on your clothing and personal comfort. Ensure the clip is fully engaged with the fabric of your pants or belt to prevent accidental detachment.
Step 2: Secure the Drill
Once the caddy is positioned, insert your cordless drill into the holder. The universal design accommodates various drill shapes and sizes. Push the drill firmly into the caddy until you feel a secure click or resistance. The retention mechanism should hold the drill tightly, preventing it from falling out even if you bend over or move quickly.
If the drill feels loose, check the orientation of the drill handle. Some caddies work better with the handle facing forward or backward. Experiment with the position to find the most comfortable carry style for your specific drill model.
Step 3: Attach the Bit Caddy
Next, attach the Bit Caddy to your setup. You can wear it anywhere on your waist, or clip it straight onto your Drill Caddy. Attaching it directly to the Drill Caddy keeps your bits and drill together in one compact unit, which is ideal for small jobs where you need quick access to both tools.
For larger jobs, you might prefer to wear the Bit Caddy on the opposite hip. This distributes the weight more evenly across your body and prevents the bit holder from interfering with your drill access. The N35 magnet inside the Bit Caddy will securely hold your bits in place, so you do not need to worry about them falling out during movement.
Optimizing Bit and Fastener Access
Proper organization of your bits is just as important as securing your drill. A well-organized Bit Caddy ensures that you can find the right bit quickly, reducing frustration and increasing efficiency. Here are some tips for optimizing your bit storage.
Sort your bits by size and type. Group drill bits together, followed by screwdriver bits, and then hex bits. This logical arrangement allows you to locate the correct bit without having to dig through the magnetic holder. If you use a wide variety of bits, consider using the Large Bit Caddy to accommodate your collection.
Keep your most frequently used bits in the outer layer of the magnetic holder. These bits are the ones you reach for most often, so placing them on the outside saves time. Reserve the inner layers for less common bits or specialized tools that you only need occasionally.
Regularly check the strength of the N35 magnet. Over time, the magnet may lose some of its strength due to wear and tear. If you notice that bits are falling out more frequently, you may need to replace the Bit Caddy or adjust how you load the bits. The Bit Caddy is built to work for daily, hands-on use, but like any tool, it requires occasional maintenance.
Maintenance and Care for Longevity
To ensure your wearable tool organization system lasts for years, follow these maintenance guidelines. Proper care will extend the life of the caddies and keep them functioning at peak performance.
Clean the caddies regularly to remove dust, dirt, and debris. Use a damp cloth to wipe down the exterior of the Drill Caddy and Bit Caddy. Avoid using harsh chemicals or solvents, as these can damage the materials and weaken the magnetic retention in the Bit Caddy.
Inspect the clips and straps for signs of wear. If the clips become loose or damaged, they may not hold the caddies securely to your waistband. Replace any damaged components immediately to prevent accidents on the job site. The Drill Caddy and Bit Caddy are engineered and assembled in the USA, ensuring high-quality materials and construction.
Store the caddies in a dry place when not in use. Moisture can cause rust on the metal components and weaken the magnet in the Bit Caddy. By keeping your tools dry and clean, you will maintain their performance and reliability for every project.
Key Takeaways
- Universal Compatibility: The Drill Caddy is designed to hold virtually any cordless drill brand, making it a versatile solution for DIYers and professionals alike.
- No Belt Required: The caddies clip directly to your waistband or belt loops, eliminating the need for a bulky, heavy tool belt.
- Magnetic Bit Retention: The Bit Caddy uses a powerful N35 magnet to keep your bits and fasteners secure and organized.
- USA Assembled: Every My Tool Mania product is engineered and assembled in the USA, ensuring high-quality craftsmanship and durability.
- Risk-Free Trial: Every order is backed by a 30-day risk-free trial, allowing you to try the system with no financial commitment.
- Free Shipping: Free shipping is available on US orders over $40, making it easy to get your setup without extra costs.
- Productivity Boost: Users report a significant reduction in time spent searching for tools, leading to faster and more efficient work.
Frequently Asked Questions
Will the caddies fit my drills and bits?
Yes. Our caddies are built to securely hold drills and bits of standard sizes from all the major brands. The universal design accommodates a wide range of tool dimensions.
How do I install or wear them?
Clip them to your belt or waistband in seconds — no belt required — or mount to a wall or bench with the included hardware. No special tools needed.
What's your return policy?
Every order is backed by a 30-day risk-free trial. If it isn't for you, send it back for a full refund.
Where are your products made?
Every My Tool Mania product is engineered and assembled in the USA.
Can I wear the Bit Caddy separately from the Drill Caddy?
Yes. You can wear the Bit Caddy anywhere on your waist, or clip it straight onto your Drill Caddy. This flexibility allows you to customize your setup based on your needs.
How strong is the magnet in the Bit Caddy?
The Bit Caddy uses a powerful N35 magnet that holds bits and fasteners securely in place. It is designed to withstand the rigors of daily use without losing its magnetic strength.
Is the Drill Caddy comfortable for all-day wear?
Yes. The Drill Caddy is designed to ride comfortably wherever you want it. The lightweight construction and ergonomic design ensure that it does not cause discomfort during long workdays.
Get Your Setup Today
Stop losing time hunting for your tools. Upgrade your DIY workflow with the Drill Caddy and Bit Caddy system. Shop the Bundle & Save 15% to get complete, head-to-toe tool accessibility. Visit My Tool Mania to explore the full lineup and start working smarter today.